29 August 2010

Coleslaw

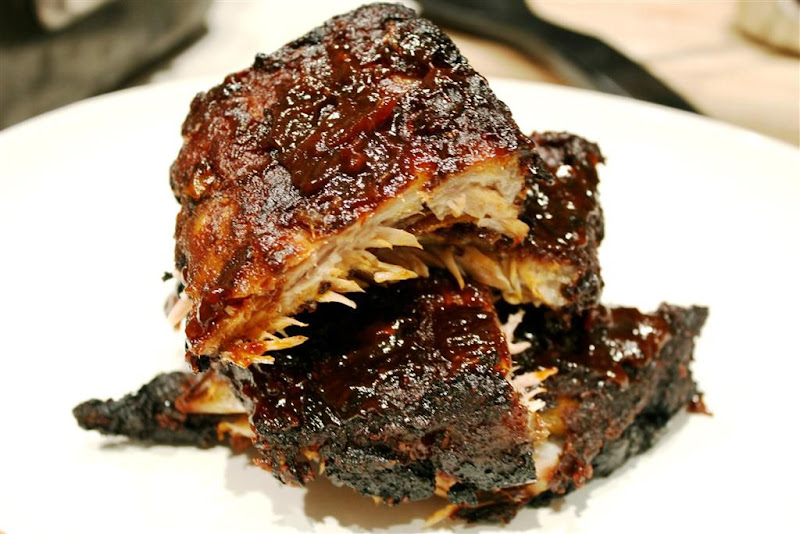
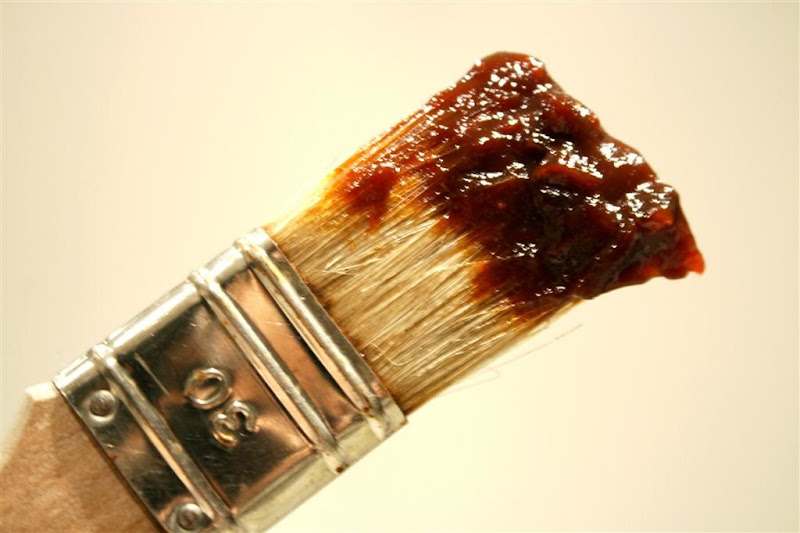
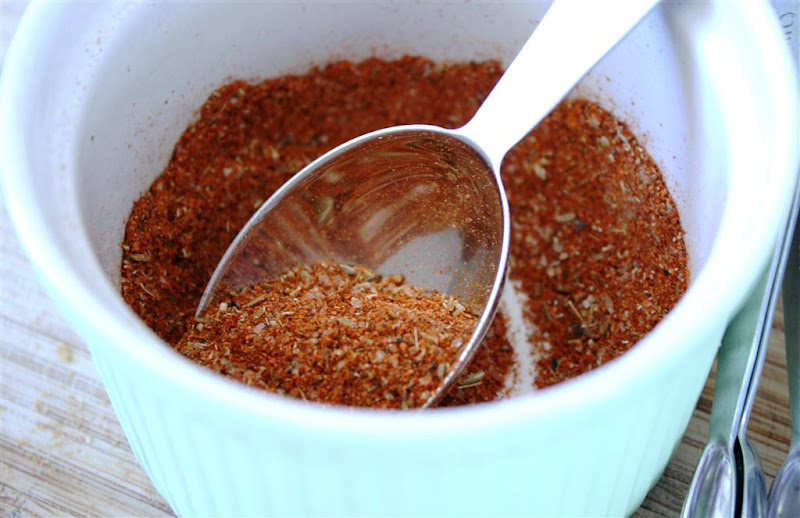
At the moment, I'm still kind of waiting for my renovations to complete, so its a bit hard to get back to my regular cooking routine. So when my friends asked me to bring something along for a weekend BBQ get together, the only thing I could commit to was a salad. I immediately thought of making a coleslaw. For me, coleslaws are a must-have item with BBQ meats. The tanginess of the coleslaw gives a nice break to all the meat being consumed. :)

I prefer a coleslaw that doesn't have too much mayo used. So this time, instead of using mayonnaise, I substituted it with a Greek style yogurt. I still added in the Dijon mustard and some whole grain mustard for some extra tang.
Coleslaws are quite flexible with what ingredients you add in. When I was searching online for a base recipe to refer back to, I found Ina Garten's Blue Cheese Coleslaw. If I had some blue cheese, I would have added it in, but I didn't have time to go out and buy some before going over to my friend's place for the BBQ. The next time I feel like making coleslaw again, I would definitely give the Blue Cheese Coleslaw recipe a go.


Coleslaw
preparation time: 30 mins

Ingredients:

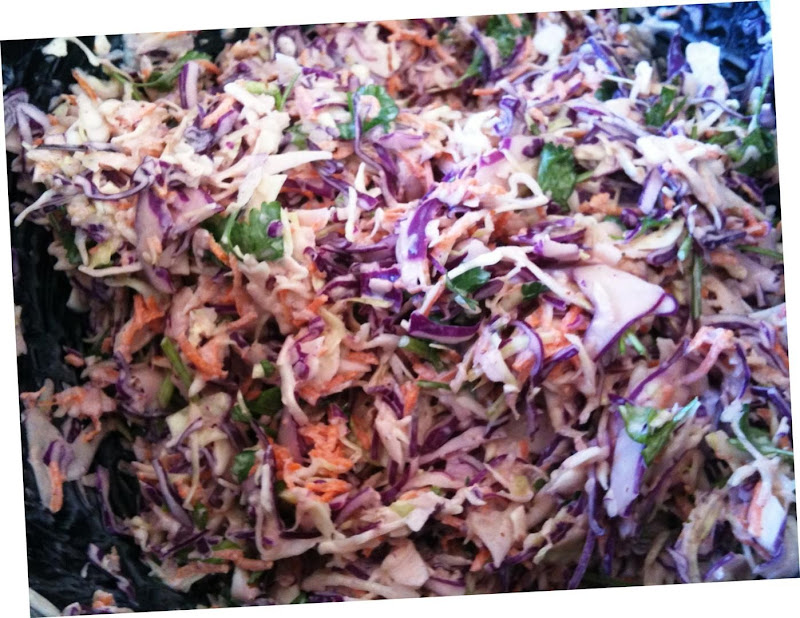
  • 1/2 small head green cabbage (sliced using food processor or mandolin)
  • 1/2 medium-sized head purple cabbage (sliced using food processor or mandolin)
  • 2 large carrots (peeled, then shredded using a food processor or grater)
  • 200g Greek Style Yogurt
  • 1/4 cup Dijon mustard
  • 2 tablespoons whole grain mustard
  • 2 tablespoons apple cider vinegar
  • 1 teaspoon celery salt
  • 1/2 teaspoon sea salt
  • 1/2 teaspoon freshly ground black pepper
  • 1/2 cup chopped fresh parsley leaves (roughly chopped)

Method:

  1. Process the cabbages and carrots through the thinnest settings of your food processor. If you don't own a food processor, you can use a mandolin or grater.
  2. Place sliced cabbage and carrots in a large salad bowl and add in the yogurt.
  3. Then add in the Dijon mustard, whole grain mustard, cider vinegar and toss to mix well.
  4. Season with a teaspoon of celery salt, sea salt and freshly ground black pepper
  5. Add the parsley leaves, toss the coleslaw until the mixture is even. Taste and adjust seasoning if required.
  6. Keep refrigerated until ready to serve.

06 August 2010

Steamed Garlic Prawns (with Coriander)

Just realised I've been neglecting my blog a bit. Its nearly been two months since my last posting. I do have a good excuse though.. I've finally purchased my own apartment !!! Woot !

After sorting out the home loan, I've been running around trying to sort out the renovation work. Getting quotes from builders, and choosing everything from toilet, tiles to taps. So needless to say, I haven't been able to do much cooking.

I love my garlic prawns. I've had similar dishes to this at Chinese restaurants before, but I've only seen it cooked with garlic only and maybe some spring onions thrown over the top as garnish. Although I would agree you can never have too much garlic in a dish, I like to mix in some coriander to lighten it up a bit and add some extra freshness into the dish. The key with cooking this dish is to steam the prawns over simmering water for no more than 3 minutes. And to use hot oil to "pre-cook" the coriander and garlic mixture.


Steamed Garlic Prawn (with Coriander)

Ingredients:
  • 1 Dozen Fresh King Prawns (vein removed, using scissors open the prawns up flat)
  • 1/2 bulb garlic (finely chopped)
  • 1/2 bunch fresh coriander (stem & leaves, finely chopped)
  • 4 tablespoons of Grapeseed oil
  • 1/2 teaspoon of salt
Method:
  1. Using a pair of scissors, cut through the shells and open up the prawns until they can lie down flat and remove the vein. Give the prawns a quick wash in some icy cold water and then leave in a colander.
  2. Prepare the garlic and coriander mix, and add in the 1/2 teaspoon of salt. And set aside in a ceramic, glass or heat proof bowl.
  3. Bring a wok with some water for steaming to boil.
  4. Using a separate saucepan, heat up 2 tablespoons of grapeseed oil until the pan starts to smoke.
  5. Pour the hot oil into the garlic and coriander mix. Work slowly and pour a bit at a time into the bowl. The garlic and coriander should be cooked by the hot oil.
  6. Lay out the prawns on a plate, and smear a spoonful of the garlic and coriander mix into each prawn's exposed flesh
  7. Place a rack into the wok
  8. Place plate over the rack, cover and let steam for about 2-3 mins (depending on the size of the prawns used). My prawns were about my hand's length long and I steamed them for just under 3 mins.
  9. Once done, remove the plate from the wok and set aside.
  10. Heat up the remaining 2 tablespoons of grapeseed oil and lightly drizzle the hot oil over each prawns.
  11. Serve immediately with some steam rice.


Enjoy.. :)


12 May 2010

Grill Chicken Thigh Steaks with Garlic, Thyme and Lemon

I haven't done much cooking since I've been down with the flu for the last couple of days. But still, there comes to a point when there is only so much instant warm oats, porridge and plain Congee that I can continuously eat. Having not done grocery shopping for the past week, the only thing I found in my fridge was 3 pieces of frozen chicken thigh.

All I could think of was something that would be quick, easy and full of flavour.

So after quickly defrosting the chicken in my microwave (yes.. I know.. not the best method..but I was hungry!!)... I teamed up the chicken with some garlic, lemon and some fresh thyme from my herb garden and grilled it on my cast iron griddle pan. Result ? Well.. It's a classic combination, so I couldn't really go wrong there. Still its something I'll definitely make again. I mean, it could have something to do with the fact I had been eating plain congee the whole day, but the smell was just amazing :)

Grill Chicken Thigh Steaks with Garlic, Thyme and Lemon

Ingredients:
  • 3 pieces Chicken Thigh pieces (boneless)
  • 2 cloves garlic (peeled, smashed)
  • zest of 1 lemon
  • juice from 1 lemon (use the zested lemon)
  • 3 twigs fresh thyme
  • 1/2 tablespoon olive oil
  • Salt & Pepper to taste
Method:
  1. Slice open the chicken thigh pieces and butterfly them so that it lays out evenly flat.
  2. Marinate the chicken with the olive oil, garlic, thyme, lemon zest, salt & pepper and juice of 1/2 of the lemon.
  3. Let the chicken sit in the marinade for at least 15 mins.
  4. Place the griddle pan over high heat and wait for it to get really hot
  5. Place the chicken steaks onto the griddle pan and cook each side for 2 mins. Then turn them once more every minute or so on each side, until you can see all the meat has turned white and opaque.
  6. Remove them from the pan, squeeze the juice of the remaining 1/2 lemon over the steaks, season with a little bit more of salt and pepper, and then let rest on a plate for about a minute before serving.
  7. Serve with some baked potatoes or green vegetables. Chicken also tastes great the next day sliced into finger-sized pieces tossed through some green salad.


Notes:
  • There was quite a bit of smoke being generated from my grill pan. I would suggest you have all windows open and the exhaust fan on full whack when making this.
  • If the grill pan is hot enough the chicken meat should not stick to the pan. So you shouldn't need to add any oil to the pan.

27 April 2010

Macaron: Quest for Feet - Part 1

I love macarons. Eating them that is. I've never really been game enough to make them. Its probably because I know I suck at desserts that need baking. Cooking.. I enjoy. Baking.. only when it actually turns out right. And for me.. most of the time.. it doesn't.

Then I read this post on Almost Bourdain. I agreed. Why not ? Afterall its only going to take me 3 egg whites, some almond meal and some icing sugar. And if it did fail, I could just vent out my frustration by smashing up the unsuccessful macarons and use them as sprinkles on top of some vanilla ice cream.

So began my macaron saga.. the quest for feet. Yes. The much coveted Feet. The visual sign of a perfect macaron :)

I said visual sign, because this isn't the only element of a perfect macaron. SeriousEats.com sums it up nicely...

"The Mallomar-shaped cookie must have a 'foot,' a crackly ringlet that surrounds the flat side. The outer shell is thinner than an eggshell but has an eggshell-like quality. Poking through the shell gives way to soft, almost-meringue texture."

Roasted Black Sesame Macarons
  • 1 cup confectioners’ sugar
  • 3/4 cup ground almonds (I used almond meal)
  • 1/4 cup finely ground black sesame
  • 3 egg whites (6 tablespoons of egg whites)
  • Pinch of salt
  • 1/4 cup granulated sugar
Method:
  1. In a food processed mix the ground almond, ground black sesame and icing sugar to make sure there’s no lumps.
  2. Whip the eggs whites with a pinch of salt and slowly adding in the granulated sugar until you get soft peaks. Add the dry ingredients to the egg whites and start folding. To make things easier, add in the dry ingredients half at a time.
  3. Fold until you get a slow moving batter. Aka the flow-like-magma consistency.
  4. Pipe the macaron batter onto baking paper.
  5. Bake at 160C for 12 mins
  6. Remove from oven and let cool. Pair up the macarons of a similar size ready for the filling.

Attempt 1 - Failed

Notes:
  • Followed the recipe (well... I think I did)
  • I probably tried a bit too hard not to over mix the Egg whites. As a result I think I didn't mix it enough, so ended up with the cracked tops. Whoever said Macarons could smell fear were right... !
  • Oven at 160C
  • 12 mins in the oven
  • Tops started cracking at about 6-7 mins in...
Bleh....Ok.. I kind of expected this. If I succeeded the first time, I would have been really surprised. Ecstatic. But still really surprised.

They still tasted great. The roast black sesame flavour really came through.

Attempt 2 - Semi Failed

I jumped back online and googled what could be the cause of my macarons cracking. I was thinking that maybe its more than just under-mixing. Someone suggested cracking occurs if the oven wasn't hot enough. So thinking that my oven may not be hitting 160C, I cranked it up a notch. And set it on 170C. And you guessed it... they burnt...my macarons went brown.


Nice uncracked tops.. slight feet. But they went brown ! Bleh..

Notes:
  • In the oven for 11 mins
  • 170C
  • Visual Browning occurred from about 10 mins onwards
  • The base of the 1st batch I pulled out at 10 mins was uncooked and still stuck to the baking paper.
  • Tapping the tray on the kitchen bench a couple of times prior to baking (something I picked up from the last Google search).
  • Tops uncracked. Slight feet.
  • Burnt... but still really edible. Bit more chewy than the previous batch.
In truth, I couldn't really taste the burnt taste. But I'm still marking this one as failed as 1/2 of them had the base still stuck to the baking paper and weren't actually cooked through, even though the tops had browned.

I think I'm going to call it a day for now. Anyone out there have any tips ?


17 April 2010

Chicken with Rosemary, Olives and Tomato Sauce

On most weeknights when I get home from work, I open up my fridge, stare at the contents for about 5 mins and contemplate what I could conjure up for dinner. Usually if I'm feeling lazy, I'll make what I call my 'one pot meal', which usually consists of meat with some veg and whatever else I feel like throwing in.

Usually using whatever ingredients I have available from my fridge and pantry that's nearing its shelf life...

I had some of this with green salad and bread the first night. Then the leftovers tossed with some spaghetti the 2nd night. Not bad considering its just chicken with some rosemary, olives, anchovies and canned tomatoes. :)


Chicken with Rosemary, Olives and Tomato Sauce

Ingredients:
  • 1 tablespoon olive oil
  • 2 chicken maryland pieces (Thigh & Leg of chicken - separated into 3 pieces)
  • 1 fresh rosemary sprig
  • 1 Bay leaf
  • 1 red onion (finely sliced)
  • 3 garlic cloves (crushed)
  • 2 anchovy fillets, chopped
  • 120ml white wine
  • 2 tablespoon olives
  • 400g can whole tomatoes
  • 1/2 cup of water
  • Salt & Pepper
Method:
  1. Season the Chicken with freshly grounded Salt and Pepper
  2. Heat oil in a dutch oven pot or heavy bottom pan, then brown the seasoned chicken all over and remove and set aside.
  3. In the same pan, gently cook the onion for about 5 mins until soft.
  4. Add the garlic, anchovies and rosemary, then fry for a few mins more until fragrant. The anchovies would just melt away as it cooks.
  5. Deglaze the pot with the wine
  6. Add in the olives, canned tomatoes and about 1/2 cup of water
  7. Bring to the boil, then return the chicken pieces to the pot.
  8. Reduce the heat, cover, then cook for 40 mins until the chicken is cooked through.
  9. Taste and season with salt and pepper if required.
  10. Serve with a crisp green salad and crusty bread or with some spaghetti tossed through.


12 April 2010

Duck Fat Potatoes (2) - Pommes de Terre Sarladaise

If you can recall, I still have close to 1/2 kg of duck fat sitting in my freezer. Apart from duck fat potatoes I haven't really ventured into anything else with the duck fat yet. One of these days when I do have time to spare, I will try to tackle the duck confit. But not now.

I actually think this method is better than the way I was making them before (which is why I'm reposting this).

You might be thinking.. Its duck fat potatoes... can they really go wrong ?! Well no. You can't. But after several tries on different versions (all of which were extremely tasty), there was one standout recipe.

Well... Crispy coating. Soft fluffy interior. :)

So here is another take on Duck Fat Potatoes.


Duck Fat Potatoes (2) - Pommes de Terre Sarladaise
  • 3-4 Red Skinned Potatoes (peeled - cut into rough chunks)
  • 2 Cloves Garlic (Crushed with the flat side of the blade, skin left on)
  • 8-10cm Sprig Rosemary
  • 3 tablespoons Duck Fat
  • 1/2 teaspoon Salt
  • Freshly grounded Black Pepper and sea salt for seasoning
Method:
  1. Bring a large deep saucepan with water to boil add the 1/2 teaspoon of salt.
  2. Place the peeled and cut up potatoes into the water, bring to boil and reduce heat and let simmer for about 15 mins. Or until the edges potatoes start to soften.
  3. Pre-heat oven to 180C with a tray lined with a piece of baking sheet.
  4. Once the potatoes are done, drain them and give them a quick jiggle in the colander to rough up the edges a bit
  5. Using a pan, melt the duck fat and add in the crushed garlic and rosemary sprig.
  6. Add in the drained potatoes and toss the potatoes around until they are covered in the duck fat.
  7. Carefully remove tray from the oven.
  8. Transfer potatoes, fat, garlic and rosemary on to the baking sheet lined tray and place back into the oven. Cook for 35-40 minutes or until potatoes turn golden brown.
  9. Remove from oven and season with some freshly ground black pepper and sea salt flakes.


09 April 2010

Cantonese Style Beef Brisket

After the Beef Rendang, I've been looking around to find another recipe that I can make in bulk on the weekends, then frozen and ready to be consumed during the week. Work has been rather busy the past week, and by the time I get home, there just isn't enough time to cook something from scratch.

This Cantonese Style Beef Brisket is relatively inexpensive (at about $5-6 for 1kg of beef brisket) and quite easy to make. It also freezes really well and goes great with plain rice or noodles. The Daikon Radish was added to bulk up the stew a bit more. Unlike potatoes, the radish doesn't break down and isn't starchy after cooking. Its not a must have item, and you can omit this if you can't find any radish. However, if you are able to easily source some then do try adding them to the stew. As during the cooking process, the radish sucks up all the flavours of the stew and becomes really quite tasty. :)


Cantonese Style Beef Brisket
Recipe adapted from Pigpigscorner.com
  • 1kg Beef Brisket (chopped into chunks)
  • 500g Daikon Radish (peeled and chopped into chunks)
  • 1/4 cup Shaoxing Wine
  • 5 slices Ginger
  • 3 cloves Garlic (crushed)
  • 2 tablespoons Chu Hou Sauce
  • 2 Star Anise
  • 1 piece Cassia bark
  • 1 small piece of Rock Sugar (about
  • Light Soy Sauce
  • Cornstarch Slurry (1 teaspoon cornstarch mixed with cold water)
Method:
  1. In a pot heat up the oil, add ginger and garlic, saute until fragrant.
  2. Add beef brisket and stir until the beef is evenly brown
  3. Deglaze with the Shaoxing wine.
  4. Mix in Chu Hou sauce.
  5. Add star anise and cinnamon stick
  6. Add radish, rock sugar and enough water to cover all ingredients.
  7. Bring liquid to boil, lower heat and cover to simmer until meat is tender (at least 1 1/2 hours). Stir the ingredients around half way through. I left the stew simmering for 2 hrs.
  8. Add light soy sauce to taste.
  9. If required, thicken the stew with cornstarch slurry.
Notes:
  • Chu Hou Sauce is available at most Asian supermarkets.


07 April 2010

Chicken Wings with BBQ Sauce

I prepped these last night so that we could have something to munch on while watching the Arsenal vs Barcelona match this morning. Its nearly 6.30am and the game is into its 80 minute mark soon. The score when I walked away to start up my laptop was 3-1 to Barcelona. :(

Oh well.... at least the chicken wings were yummy... :)


Chicken Wings with BBQ Sauce
  • 1kg Chicken Wings (Tips discarded, Wings and Drumlette separated)
  • Juice of 1 lemon
  • 2 tablespoons dry spice mix
  • 1/2 cup BBQ Sauce
Method:
  1. In a large bowl, marinate the pieces of the chicken wing with about 2 tablespoons of the dry spice mix. Then squeeze the juice of one lemon over the chicken wings. Mix well and cover the bowl with some cling wrap and place into the fridge to marinate overnight.
  2. When ready to cook the wings, remove from the fridge and pre-heat the oven to 180C.
  3. Arrange wings over a cake cooling rack (sitting over a tray to catch the drippings) and bake for about 20 mins.
  4. Remove from oven and generously brush each wing with some BBQ sauce. Switch the oven to the grill setting and return the wings to the oven for another 2-3 mins
  5. Take the tray out, flip the wings over, brush with BBQ sauce and return to grill for another 2-3 mins.
  6. You should be able to see the BBQ sauce start to bubble and caramelise. Remove from the oven and serve immediately.


06 April 2010

Sambal Chilli (Shrimp Paste & Ikan Bilis)

I came across this recipe from The Little Teochew when I was looking around for a sambal chilli recipe. After reading it, I thought .. Ground ikan bilis.. what a great idea ! You get the taste and depth ikan bilis took to the table with the sambal chilli, but without having to constantly be munching on them. Wonderful. :)

I was looking for a sambal belacan type of chilli recipe though. So I omitted the salt and threw in some shrimp paste. And also added some dried chillies for extra heat.

As Ju from the little teochew said.. Its savoury, spicy and sweet at the same time. I think my sambal turned out a bit dry (but still very tasty), so will probably double the amount of oil required the next time.


Sambal Chilli (Shrimp Paste & Ikan Bilis)
recipe adapted from The Little Teochew
  • 70g Fresh Chilli
  • 1 large red onion
  • 10 dried red chilli (soaked in water)
  • 6 cloves garlic
  • 3 tablespoons oil
  • 80g ikan bilis (grounded)
  • 1 tablespoon piece palm sugar
  • 1 tablespoon sized piece of belacan (dry toasted in foil packet)
Method:
  1. Blend fresh chilli, soaked dry chilli, red onion and garlic together in a food processor to form a smooth paste.
  2. Wrap the belacan in some aluminium foil and toast it over a hot pan until you start to smell the shrimp paste.
  3. To the heated pan, add the oil and stir fry the ikan bilis powder until fragrant. Add the blended chilli paste, toasted belacan and sugar and stir fry for another 15 mins until the oil starts to separate.


30 March 2010

Beef Rendang

I love the aromatic spices that fills my kitchen when I make this dish. The weather has started to turn chilly the past couple of days, and whats better than sitting in front of the TV with a warm bowl of spicy coconut beef stew ??

It usually takes me about 3 hours from beginning to end to make this, but it is so worth it. :)

Whenever I do make this now, I try to make a big pot, so that at least it lasts a bit longer. The leftovers always taste better the next day or two.

If I really wanted Beef Rendang right now, then I'll resort to my pressure cooker recipe. But in terms of taste, this recipe from Rasa Malaysia is still ahead by a long way. I don't think I've gone back to my pressure cooker recipe ever since I discovered this one.

My local Asian Butcher doesn't understand what Beef Short Rib is, so I settle for Gravy beef or Chuck Steak instead.


Beef Rendang
Recipe from Rasa Malaysia.com

Ingredients:
  • 1 1/2 pound boneless beef short ribs (cut into cubes)
  • 5 tablespoons cooking oil
  • 1 cinnamon stick (about 2-inch long)
  • 3 cloves
  • 3 star anise
  • 3 cardamom pods
  • 1 lemongrass (cut into 4-inch length and pounded)
  • 1 cup thick coconut milk
  • 1 cup water
  • 2 teaspoons tamarind pulp (soaked in some warm water for the juice and discard the seeds)
  • 6 kaffir lime leaves (very finely sliced)
  • 6 tablespoons kerisik (toasted coconut)
  • 1 tablespoon sugar/palm sugar or to taste
  • Salt to taste
Spice Paste:
  • 5 shallots
  • 1 inch galangal
  • 3 lemongrass (white part only)
  • 5 cloves garlic
  • 1 inch ginger
  • 10-12 dried chilies (soaked in warm water and seeded)
Method:
  • Chop the spice paste ingredients and then blend it in a food processor until fine.
  • Heat the oil in a stew pot, add the spice paste, cinnamon, cloves, star anise, and cardamom and stir-fry them until aromatic.
  • Add the beef and the pounded lemongrass and stir for 1 minute.
  • Add the coconut milk, tamarind juice, water, and simmer on medium heat, stirring frequently until the meat is almost cooked.
  • Add the kaffir lime leaves, kerisik (toasted coconut), sugar/palm sugar, stirring to blend well with the meat.
  • Lower the heat to low, cover the lid, and simmer for 1 – 1 1/2 hours or until the meat is really tender and the gravy has dried up.
  • Add salt to taste. If not sweet enough, add more sugar to taste.
  • Serve immediately with steamed rice and save some for overnight.
Notes:
  • To prepare the kerisik or toasted coconut, just add the grated coconut to a dry wok and stir continuosly until they turn golden brown.
Additional Notes:
  • I found that about 1 hour in (maybe because I have a rather fierce gas stove), the gravy had mostly dried out. I added in probably about 1/2 cup of water and gave it a bit of a stir every 15 mins or so. Until the 1 1/2 hour mark was reached.


28 March 2010

Whole Fish Baked in Chilli Salt

I remember seeing this method deployed by Jamie Oliver on one of his cooking series. At the time, all I could remember was that a vast vast amount of salt was used. With the fish buried in salt, I had wondered how the fish wouldn't come out too salty. I later realised it might have helped if I had asked my local fishmonger to leave the scales on. But if you push away the skin, the underlying meat isn't that salty at all. In fact, the fish meat turned out incredibly tasty and moist.

The chilli plant I was given a while ago, had finally produced enough chillies for harvest, so I was eager to test out the recipe for making some chilli salt (another thing I learnt from Jamie). Baking and hopefully infusing the fish with the chilli from the salt seemed to be a good idea at the time. Although I wasn't sure how much of a chilli kick I would get, so I only used 4 chillies. This gave it a slight hint of a chilli kick, the next time I try this again, I would probably add a couple more.


Whole Fish Baked in Chilli Salt
adapted from Jamie Oliver's cooking show
  • 1 Whole Snapper (about 600g)
  • 2 Bay leaves
  • 3 Sprigs Thyme
  • 3 Egg whites
  • Lemon wedges
  • Olive oil
For the Chilli Salt:
  • 1kg of Coarse Salt
  • 4 Fresh Chilli (I used small chinese chillies).
Making the Chilli Salt:
  1. Working in small batches, use a pestle mortar to grind the fresh chillies and the coarse salt together. The chilli gives the salt a pinkish tint and at the same time infuse the salt with that chilli kick. Using a sieve, pass the grounded salt through to catch the chilli seeds and repeat until all the salt has turned a pinkish colour.


To Bake the Fish:
  1. Preheat oven to 190C.
  2. Place chilli salt and egg whites in a bowl and combine. The mixture should have a consistency like damp sand.
  3. Spread a layer of salt mixture over the base of a oven baking tray. Place fish on top and top with remaining mixture, while sticking in the bay leaves and thyme.
  4. Bake for 30 minutes. Remove fish from oven and cool for about 5 minutes then, using a knife (with the help of a small hammer), break off the salt crust and discard.
  5. Scrape off the fish skin and remove the flesh from the bones. Serve with the lemon wedges and a drizzle of olive oil.

caking the fish with chilli salt.. :)


21 March 2010

Otak Otak (Grilled)

Otak Otak is a parcel of spicy fish coconut custard. Which is sometimes referred to as 'Fish Mousse'. I was introduced to these little babies when my old Uni friends took me to the Bedok night market place in Singapore. Back in Australia, by chance I happened to find Otak Otak being sold at one of the stalls in the South Sydney market. But it wasn't really the same. Sure.. I could go to Malaya (A top notch Malaysian cuisine restaurant in Sydney) and order Otak Otak there. But there's something about paying $15 for two pieces of Otak.. it just doesn't feel right.

So I decided to make my own. :)

That's when I realised there are two versions of Otak Otak. The steamed version which seems to originate from Malaysia - which I found many recipes for online. Then the Grilled Singaporean version - which I found many pictures of online, but no recipes.

So I took the recipe for the steamed version, changed bits and pieces of it according to what I could recall consuming and came up with this.

I changed the fish fillet slices to mince fish paste, since I don't remember there being any individual slice pieces of fish. A lot of recipes recommend getting Spanish Mackerel, but there wasn't any available at my local fishmonger, so I settled for some Red Snapper fillets instead. I also don't recall there being any whole betel leaves in the grilled Otak parcel. Also, being in Australia, I'm not actually sure where you can actually buy these. So I left them out also.

If you like, you could substitute spinach leaves for the betel. I tried this with the first couple parcels, but ended up leaving the leaves out.


Otak Otak
recipe adapted from Nonyafood.com

Ingredients:
  • 1 banana leaf (cut into 12-15 cm wide rectangles and soak in hot water to soften the leaf)
  • 500g fish fillet (minced with a food processor)
  • 20-30 wild betel leaves (daun kaduk) - If you can find any
Spice Paste:
  • 10 shallots
  • 3 cloves garlic
  • 6 fresh red chilies
  • 5 dried red chilies (soaked in water)
  • 2 stalks lemon grass
  • 1 inch galangal
  • 1 inch turmeric
  • 20g shrimp paste (toasted)
  • 2 teaspoons palm sugar (pounded into a soft powder)
Custard ingredients:
  • 2 eggs
  • 1 cup coconut milk
  • 2 teaspoons rice flour
  • 3 kaffir lime leaves (finely sliced)
  • 1 teaspoon salt
Method:
  1. Roughly chop up the spice paste ingredients and then place in a food processor and blend until fine.
  2. Remove spice paste from the food processor and set aside in a large bowl, add fish fillets to the food processor and blend until it has turned into a minced fish paste.
  3. Transfer the fish paste into the spice paste bowl and stir well to combine.
  4. Add in the custard ingredients and mix well.


  1. Cut out the banana leaves into 15cm wide rectangles.
  2. Soften the banana leaves by soaking them in hot water.
  3. Take 1 piece of banana leaf and place 2-3 betel leaves (if using) in the center of a banana leaf. Then add 2-3 tablespoons of the Otak mixture into the middle of the leaf.
  4. Form a bundle by folding one side of the banana leaf over the mixture, and then turning it over once to use the remaining side. Secure the ends with staples or toothpicks.
  5. Heat up a grill pan (I used my cast iron grill pan) over high flames. And grill for about 10 mins, turning every 2-3 mins. If you have a charcoal grill bbq, use that instead.
  6. Serve immediately.


And the finished product...Ta Daa..!

Although I remember these being a bit darker in colour. The taste was very close though. I mean, the taste and fragrance of the spices were all there, but it wasn't totally the same, I think the texture was slightly different. P thinks the difference was because we didn't cook it over a charcoal grill. I think he might be right, as the Otak would have dried out a bit more if we had cooked it over a charcoal grill. And that might help to intensify the flavours and get the texture we wanted.


So with some time still left before the shops started to close (Its Australia..Shops close 5pm on Sundays), we drove to the nearest Barbecues Galore store and bought ourselves a small charcoal barbecue. :)


After getting everything setup and the charcoal beads burning.. We finally made this..


Mission accomplished.. :)


20 March 2010

Coconut Milk & Sago Agar Agar Jelly

Later today, I'll be heading over for a Hot Pot session at S & P's place. Yes... I have mad friends that have Hot Pots on 29C days. Although I'm probably equally as insane as I told them I'll be there too and will bring something for dessert. S's specialty is a Taiwanese Style hot pot that is not only hot in temperature, but also super hot in Chilli spice levels. So hot that your mouth actually goes numb. I'm not sure what she uses, as it is apparently a family recipe. All I know is that she starts cooking the soup base from scratch the night before.

As I promised to bring something for dessert, all I could think of was something that was a bit more cooling. I also wanted to make something that would be able to use up the remainders of an open carton of coconut milk I had leftover from the Otak Otak. I was thinking of Coconut milk and Sago, but since I had to transport it to my friend's place, I preferred something that wasn't in a liquid form. After a quick search online, I stumbled upon this recipe at My Kitchen Snippets. And decided to go with something similar.

I didn't have any food colouring, so used a couple of drops of Pandan essence instead.


Coconut Milk & Sago Agar Agar Jelly
Recipe adapted from My Kitchen Snippets

Transparent Layer:
  • 1 tablespoon Agar Agar powder
  • 600ml water
  • 1/4 cup white sugar
  • 1 Pandan Leaf (tied into a knot, or a couple drops of Pandan essence)
Coconut Milk Layer:
  • 1 tablespoon Agar Agar powder
  • 500ml thin coconut milk
  • 100ml water
  • 1 Pandan Leaf (tied into a knot, or a couple drops of Pandan essence)
  • 1/4 cup white sugar
For the Sago:
  • 2/3 cup Sago pearls
  • 3 cups of water
Method:
  1. In a saucepan, bring the 3 cups of water to boil. Add in the sago pearls and boil uncovered for about 10 mins. After 10 mins, cover the saucepan with a lid and turn off the heat and let sit for another 10-15 mins, until the sago has gone transparent. Pour the contents out into a sieve and rinse under cold water. Divide sago into 2 portions.
  2. Make the Coconut layer by boiling together the agar-agar powder with water, pandan leaves or essence. Make sure there are no lumps before adding in the sugar and coconut milk. Bring to boil and then turn the heat back down to a very low flame.
  3. Make the Transparent layer by boiling together the agar agar powder, water, sugar and pandan leaves or essence. Once the mixture has reach the boiling point, turn the heat down to the lowest setting.
  4. Add one portion of the sago into each of the mixtures and stir well.
  5. Pour in 1/2 of the transparent layer (make there is sago) in to a 8" wet baking dish or mold. Place the dish in to the fridge for about 5 mins to let it set
  6. Remove from the fridge, gently scratch the surface with a fork.
  7. Take another 1/2 of the coconut mixture and pour on top of the transparent layer, return to the fridge for another 4 mins to let it set.
  8. Continue the same process, gently scratching the surface with a fork before pouring on the remaining transparent layer and repeat the process with the remaining coconut layer.
  9. Chill in the fridge for a couple of hours before slicing. Serve cold.

Taste Test: Leftover bits of the Transparent layer that was just enough for 1 cupcake mold.

Notes:
  • Agar Agar powder and strips are commonly found in Asian grocery stores. You can substitute with Gelatine instead and follow the instructions on the back of the packet.
  • To help unmold the jelly, place it on top of a hot towel for about 30 secs then tip it upside down onto a plate.


18 March 2010

Momofuku Milk Bar's Crack Pie

When I saw the post on Almost Bourdain.. I thought.....Oooh.... Must. Make. Pie... Crack Piiieeeee... :)

So I went out to get the necessary ingredients for the Pie, and was all set to make Crack Pie the next day after work. But then work and other annoying things caught up with me, and I never did end up making it that Thursday night.

Now that I have another week before I have to go in to get my two bottom wisdom teeth surgically removed. I thought... if I don't make it now, it would be a while before I'll be able to eat anything like this again. And after the pitiful week I've had at work.. I needed some pie.

Oh.. and for my colleagues at work, who I know follows this blog.. The final straw in my Murphy's Law plagued week. The Sparky plugged a new 3-phase rack (with kit) into configuration that had it drawing 415V instead of 240V. Lets just say there was a slight burning smell in the air. I guess I should be glad it didn't trip the Inergen gas sensors.

Ok. Enough venting about work. Back to the recipe.

I found there was quite a bit of melted butter oozing from my pie during the cooking process. So the next time I make this, I might try to reduce the butter requirements. I've tasted this when it first came out of the oven, cooled to room temperature, and cold from the fridge. I think I prefer it best when it was at room temperature, served with some plain vanilla ice cream on the side.

Oh.. and did it live up to all the hype ? My flatmates certainly thought it did. I think I was on a bit of a sugar-high after the first spoonful. Its sweet, gooey and yet incredibly satisfying. There is something about it that makes me want to eat spoon after spoon, even though its a bit too much on the sweet-end by my usual standards.

I was actually very impressed with the crust. So tasty, yet so quick and easy to make, I think it would work well as a base for my other tarts and cheese cakes recipes.


Momofuku Milk Bar's - Crack Pie
Recipe from Momofuku's Book - as seen on LA Times and Almost Bourdain

Oatmeal Cookie for Crust

Ingredients:
  • 2/3 cup plus 1 tablespoon flour
  • Scant 1/8 teaspoon baking powder
  • Scant 1/8 teaspoon baking soda
  • 1/4 teaspoon salt
  • 1/2 cup (115g) softened butter
  • 1/3 cup (66g) light brown sugar
  • 3 tablespoons sugar
  • 1 egg
  • Scant 1 cup rolled oats
Directions:
  1. Heat the oven to 190C.
  2. In a medium bowl, sift together the flour, baking powder, baking soda and salt.
  3. Cream the butter, brown sugar and sugar until light and fluffy.
  4. Whisk the egg into the butter mixture until fully incorporated.
  5. Stir in the flour mixture until fully combined. Stir in the oats.
  6. Spread the mixture onto a 9-inch-by-13-inch baking sheet and bake until golden brown and set, about 20 minutes.
  7. Remove from heat and cool to the touch on a rack. Crumble the cooled cookie to use in the crust.
Crust

Ingredients:
  • Crumbled cookie for crust
  • 1/4 cup (55g) butter
  • 1 1/2 tablespoons brown sugar
  • 1/8 teaspoon salt
Directions:
  1. Combine the crumbled cookie, butter, brown sugar and salt in a food processor and pulse until evenly combined and blended (a little of the mixture clumped between your fingers should hold together).
  2. Divide the crust between 2 (10-inch) pie tins. Press the crust into each shell to form a thin, even layer along the bottom and sides of the tins. Set the prepared crusts aside while you prepare the filling.
Filling

Ingredients:
  • 1 1/2 cups sugar
  • 3/4 cup plus a scant 3 tablespoons light brown sugar
  • 1/4 teaspoon salt
  • 1/3 cup plus 1 teaspoon milk powder
  • 1 cup (227g) butter, melted
  • 3/4 cup plus a scant 2 tablespoons heavy cream
  • 1 teaspoon vanilla extract
  • 8 egg yolks
  • 2 prepared crusts
  • Powdered sugar to garnish
Directions:
  1. Heat the oven to 180C.
  2. Whisk together the sugar, brown sugar, salt and milk powder. Whisk in the melted butter, then whisk in the heavy cream and vanilla.
  3. Gently whisk in the egg yolks, being careful not to add too much air.
  4. Divide the filling evenly between the 2 prepared pie shells.
  5. Bake the pies, one at a time, for 15 minutes, then reduce the heat to 160C and bake until the filling is slightly jiggly and golden brown, about 10 minutes. Remove the pies and cool on a rack.
  6. Refrigerate the cooled pies until well chilled. Serve cold, and the filling will be gooey. Dust with powdered sugar before serving.

Not pretty.. but sure is yummy.. :)

17 March 2010

BBQ Pork Ribs

So you might be thinking... Recently I've posted up a recipe for BBQ dry spice rub and a homemade BBQ sauce recipe, so what did I use it on ? Well... All to make this.. BBQ Baby Back Pork Ribs. :)

You could use spare ribs for this recipe instead. For baby back ribs, the cooking time would be about ~1 1/2 hrs (thats for ribs that are tender and easy to pull apart), if you are using spare ribs then it will be about 2hrs. If you like your ribs to be 'falling apart' then add another 30 mins to the cooking time.

The ribs get the most out of the Dry Spice Rub if they are left to marinate in them for about 8-10 hrs, which mean you need to start the night before and just leave it in the fridge. If its a last minute thing, then try to let it marinate for at least 2hrs.

I don't own a Barbecue, so these ribs were cooked in an oven with a grill setting. If you own a barbecue, then bake the ribs in the oven first, then finish them off on top of the barbecue.

BBQ Pork Ribs

Ingredients:
Method:
  1. Preheat oven to 160C.
  2. Prepare the ribs by removing the white membrane underneath the ribs.
  3. If you don't already have some ready, make the BBQ Sauce
  4. Make the BBQ Dry Spice Rub and sprinkle the rub generously on both sides of the pork rib slab. Make sure all the pork is covered in the spice rub. Leave the ribs to rest in the fridge for at least 2 hrs, best if left overnight.
  5. Place pork ribs on a piece of foil and drizzle some olive oil over the ribs.
  6. Wrap the seasoned pork ribs in a foil packet. Make sure all sides are sealed.
  7. Place the wrapped pork on a baking sheet and into the preheated oven. Bake for 1 1/2 hours. (See notes above for baking times).
  8. Remove the pork ribs from the oven, and switch it to the grill setting.
  9. Carefully remove the pork ribs from the foil packet and place on your baking sheet.
  10. Warm up the BBQ sauce and liberally baste the bottom of your cooked pork ribs. Leaving the bottom side facing up
  11. Place your BBQ sauce glazed ribs into the oven and allow it to grill for 5-7 mins or until the BBQ sauce caramelizes.
  12. Flip the ribs over and baste the top of the ribs with the BBQ sauce
  13. Return the ribs to the oven and let the grill caramelize the BBQ sauce for another 5-7 mins
  14. Remove the pork ribs from the oven and allow it to rest before cutting.
  15. Baste the pork ribs with more warm BBQ sauce and serve any remaining as a condiment.
  16. Divide the rack into quarters (about 3-4 ribs a set) and serve warm.


15 March 2010

Daring Cooks Challenge - Risotto with Caramelized Onions & Roquefort Cheese

The 2010 March Daring Cooks challenge was hosted by Eleanor of MelbournefoodGeek and Jess of Jessthebaker. They chose to challenge Daring Cooks to make risotto. The various components of their challenge recipe are based on input from the Australian Masterchef cookbook and the cookbook Moorish by Greg Malouf. The main requirement of the challenge was that we must make our own stock and the risotto base.

The base consisted of wine, rice, oil, stock, cheese and butter. Then we had to choose our own variation of risotto after the base was made. I had some Roquefort blue cheese waiting for me to consume, so decided on a risotto with caramelized onions and Roquefort. I can't remember where I first saw this risotto combination (either through blog surfing or in one of my recipe books). I think I originally came across it when searching for a base recipe for the Caramelized Onion, Mushroom and Blue Cheese sauce to go with my Beef Burgers. The risotto I had in mind, was quite different to that cheese sauce. I haven't been able to locate the original recipe, but I do remember there was the port, red onions and blue cheese in the ingredients list.

Making your own stock made a major different in taste. I used a couple of chicken thigh pieces instead of a whole chook. Originally I was thinking just adding the caramelized onions was going to be a bit dull, but it actually enhance the base flavour of the risotto.

I usually use butter for my base instead of olive oil, but I think the olive oil did work better. At least I don't have to be careful about getting my butter burnt. Thank you Eleanor and Jess for the wonderful challenge! :)


Chicken Stock

Ingredients:
  • 1 large chicken 2-3 pounds about 1 kg
  • chicken bones 2-3 pounds 1 kg
  • 2 onions, roughly diced
  • 1 medium leek - white part only, roughly diced
  • 2 sticks celery, roughly diced
  • 2 cloves garlic, halved
  • 1 cinnamon stick
  • 1 tsp. white peppercorns ( Any type of whole peppercorn will do)
  • 2 bay leaves (fresh or dried, it doesn't matter.)
  • peel of 1/2 lemon
  • 1/4 tsp. allspice
Directions:
  1. Wash the chicken and bones and places in a 5 Litre pot, cover completely with water and bring to a boil
  2. Skim away any scum as it comes to the surface
  3. Add the vegetables and bring back to a boil
  4. Add the rest remaining ingredients and simmer very gently, uncovered for 1.5 hours
  5. Carefully lift out the chicken, set aside. The chicken meat can be removed from the chicken, shredded off and used for other things like soup!
  6. Simmer the stock gently for another hour. At , at the end you should have around 2 Liters
  7. Carefully ladle the liquid into a fine sieve, the less the bones and vegetables are disturbed in this process the clearer the stock will be. 

  8. The stock is now ready for use. Freeze what you don't need for later use.


Risotto Base

Ingredients:
  • 60 ml olive oil
  • 1 small onion (quatered)**
  • 400g rice (Any type of risotto rice will do. I use Arborio but the recipe itself says Vialone Nano. Another to look for is Carnaroli)
  • 60 ml white wine
  • 1 L chicken or vegetable stock , simmering
Directions:
  1. Heat oil in a pan and add onion. Fry for a few minutes to flavour the oil then discard. (We diced ours and left it in as we like onion).
  2. Add the rice and stir for a few minutes to coat each grain of rice with oil and toast slightly.
  3. Add the wine and let it bubble away until evaporated.
  4. Add enough stock to cover the rice by a finger’s width (about an inch or two). Don't actually stick your finger in, it will be hot. Just eye it off.
  5. Cook on medium heat, stirring with a wooden spoon from time to time, until most of the stock has been absorbed.
  6. Repeat Step 5 making sure to leave aside approximately 100 ml. of stock for the final step.. Repeat, save 100ml for the final stage.
  7. Once you are at this point, the base is made. You now get to add your own variation.
** Note: Since I was making a Caramelized Onion Risotto, I diced up my onion into smaller cubes and left them in also.


Risotto with Caramelized Onions and Roquefort Cheese

  • 1 litre chicken broth - See recipe above
  • Risotto Base - See recipe above
  • 4 tablespoons unsalted butter
  • 2 large red onions (thinly sliced)
  • 2 twigs fresh thyme
  • 1 cup ruby port
  • salt and pepper
  • 1/4 cup freshly-grated parmesan cheese
  • 60g Roquefort (or try goat cheese for a non-blue option) - about 1 tablespoon per serving
Method:
  1. In a separate 10-inch pan with a lid, melt 3 tablespoons of the butter over medium heat. Add the red onions and cook for about 5 minutes to soften. Sprinkle with a pinch of salt, cover the pan, and reduce the heat to low.
  2. Continue to cook for 30 minutes, stirring occasionally. Raise the heat to medium-high and add the port. Simmer the onions and let the port reduce until completely dry, about 25 more minutes. Remove pan from the heat and set a side.
  3. While the onions is cooking, in a heavy base pot (I used my dutch oven pot) make the risotto. See risotto base recipe above.
  4. Once you are at the final stage of the base risotto, pour in the last 100ml of stock, then stir in the remaining tablespoon of butter, Parmesan cheese and the caramelized onions.
  5. Cover the pot with the lid, and let the risotto sit and rest for about 5 minutes.
  6. To serve, spoon the risotto into shallow bowls and sprinkle the top with small pieces of Roquefort.


14 March 2010

Homemade Barbecue Sauce

Where possible I've always tried to avoid using pre-made sauces and packet marinades. You know the added preservatives and so on, plus its always a lot more fun and rewarding when you make your own. With the weekend to play with, I wanted to try and make my own BBQ sauce at home. At first when I saw this recipe and noticed that 11 of the 13 ingredients called either came from a bottle, jar, can or packet, I was a bit reluctant to try it out. However, Deb @ smittenkitchen.com vouched for it and the original recipe is from Ina Garten. With credentials like that, how could it not be good ?!

It was actually deliciously good. We ended up having BBQ two days straight. I think I slapped the barbecue sauce on all the reserved meats which I had defrosted from my freezer. Chicken wings, Chicken Thighs and the pork spare ribs.

I did find the taste of cumin a bit overpowering. The next time I make this marinade, I would probably try halving the amount, or try substituting the cumin with all spice or chinese 5 spice powder. I also didn't think I got the onions down to a fine enough texture. The next time I think I would puree them in my food processor first before using. I did also toss in a couple of bay leaves. I religiously include bay leaves in sauces, soups and stews. So this barbecue sauce was no exception. I'm not actually sure if they actually improved anything, so you can exclude them if you prefer to keep to the original recipe.


Ina Garten’s Barbecue Sauce
Adapted from her Food Network show as seen on smittenkitchen.com

This is a tangy, subtly spicy, delicious mutt of a barbecue sauce. On her show, Ina Garten explained that she had at one point tried to develop different sauces to complement different cuisines — from Asian to various South Eastern regions — but only when she mixed them all together in frustration did she find exactly her barbecue sauce nirvana. I couldn’t agree more. I make this all summer, freeze leftovers in one-cup servings, and sob when we run out.

Makes 6 cups
  • 1 1/2 cups chopped yellow onion (1 large onion)
  • 1 tablespoon minced garlic (3 cloves)
  • 1/2 cup vegetable oil
  • 1 cup tomato paste
  • 1 cup cider vinegar
  • 1 cup honey
  • 1/2 cup Worcestershire sauce
  • 1 cup Dijon mustard
  • 1/2 cup soy sauce
  • 1 cup hoisin sauce
  • 2 tablespoons chili powder
  • 1 tablespoon ground cumin
  • 1/2 tablespoon crushed red pepper flakes
  • 2 bay leaves - optional
Method:
  1. In a large saucepan on low heat, saute the onions and garlic with the vegetable oil for 10 to 15 minutes, until the onions are translucent but not browned.
  2. Add the rest of the ingredients. Simmer uncovered on low heat for 30 minutes. Use immediately or store in the fridge.


Notes:
  • Do ahead: This sauce freezes excellently, for months at at time.

13 March 2010

BBQ Dry Spice Rub

This is my dry spice rub I use when I want to make BBQ chicken or pork ribs. Its probably best if the meat was left to marinate in the spice rub overnight in the fridge, so that it gets at least 8-10 hrs of marinating (24hrs max). But if its a last minute thing, then try to keep it in for at least 2 hours.

The spice rub not only adds taste, but it helps to tenderise the meat for cooking by drawing excess moisture out. One reason why the Momofuku pork belly tastes so good, yet only requires a salt and sugar rub.

This recipe can easily be doubled or tripled, just try to keep the ratios the same. I usually make this rub in batches, and keep the excess spice mix in a jam jar to be used the next time.

BBQ Dry Spice Rub
  • 2 tablespoons paprika
  • 2 tablespoons chili powder
  • 1 tablespoon light brown sugar
  • 1 tablespoon rock sea salt
  • 1 tablespoon black peppercorns
  • 1 tablespoon cumin
  • 1/2 tablespoon cayenne pepper
Method:
  1. In a hot pan, lightly toast the cumin and peppercorns.
  2. Ground the cumin, peppercorns and salt in a pestle mortar until its become a fine powdery mix.
  3. Transfer to a bowl, and add in the remaining ingredients
  4. Stir until you have an even mix. Use immediately or store in a container for later use.


11 March 2010

Green Papaya Salad - Som Tum Thai

Green Papaya Salad or Som Tum Thai consists of mainly dried shrimp, peanuts, cherry tomatoes and of course green papaya. Snake beans are also added, but I didn't have any on hand. But the reason why green papaya salad is one of my favourite Thai dishes is the dressing that ties all the ingredients together. Its a combination of smashed garlic and chilli with fish sauce, lime juice and palm sugar. The end result is a salad that tastes equally sweet, sour and spicy....which I find really addictive. :)

Its the palm sugar that makes all the difference. I've tried substituting with white sugar before, but it just didn't taste the same.

I also prefer to pound up the dried shrimp until its light and fluffy. I'm not really a fan of munching on small bits of harden dried shrimp. Also P usually avoids anything that resembles the shape of a prawn, but with the shrimp pounded, its all good. Its not like he doesn't know I'm slipping shrimps into the dish, he is the one pounding it.

This is a salad you can just have on its own, or as an side dish with other red meats or seafood. I like to serve it on top of a whole Snapper or any other white fish that has been pan fried until the skin is crispy. The tanginess and spices from the salad transforms the simple pan fried fish into a totally different dish.

Green Papaya Salad - Som Tum Thai
Recipe adapted from Chez Pim's Green Beans Salad
  • 1 tablespoon Dried Shrimp
  • 1 1/2 Cups Shredded Green Papaya
  • 2 cloves Garlic
  • 1 Thai Bird Chilli
  • 1 tablespoon Roasted Peanuts
  • 8-10 Cherry Tomatoes (about a handful - big ones sliced into halves)
  • 2 tablespoons Palm Sugar
  • Juice of 1 lime
  • 2 tablespoon Fish Sauce
  • 4 Long Beans (Cut into 1/2" Lengths) - Optional

Method:
  1. Slice Green Papaya into fine strips and place into a glass or ceramic bowl
  2. In a mortar, pound and grind the dried shrimps until they turn into fluffy flakes, remove from the mortar and set aside.
  3. Gently mash up the garlic cloves in the mortar, then add the chilli and continue to grind until its turned into a chilli\garlic paste.
  4. Add in the tomatoes and gently press down on them to burst and bruise the cherry tomatoes.
  5. Add in the peanuts and pound them with the pestle until the peanuts are lightly crushed.
  6. Using a spoon, remove the mixture from the mortar and place into the bowl with the green papaya strips
  7. Add the palm sugar into the mortar and grind into a thick paste, remove from the mortar and mix into the bowl of papaya.
  8. To the bowl, add fish sauce and fresh lime juice and continue to stir until the contents are well mixed.
  9. Pour in the reserved shrimp flakes, stir and toss well to combine.
  10. Taste to check the seasonings, add palm sugar, lime juice or fish sauce as needed.


Notes:
  • If you only have blanched peanuts, just lightly toast them in a dry pan prior to using.


09 March 2010

Teriyaki Beef

This dish is super tasty yet incredibly simple and quick to make. For me it's especially great on a weekday when I usually get home from work at dinner time. In the morning before I leave for work, I would marinate the beef cubes in about half the marinade without the honey and leave it in the fridge. I find the beef tends to burn and caramelize a bit too easily while cooking if I marinate it with the honey from the start.

So I use equal amounts of soy, mirin and sake for the marinade (about 1 tablespoon each). For the teriyaki sauce, I use the other tablespoon of soy, mirin and sake mixed together with a tablespoon of honey. Also having a piece of good quality beef fillet with a decent amount of fat running through it makes all the difference. :)

Teriyaki Beef
  • 250g beef fillet (diced into 2cm cubes)
  • Cooking oil
For marinade & teriyaki sauce
  • 2 tablespoons light soy sauce
  • 2 tablespoons mirin
  • 2 tablespoons sake
  • 1 tablespoon honey (try to choose one that has a milder flavour) <-- add later for teriyaki sauce
Method:
  1. Marinate the diced beef in light soy sauce, mirin, sake and sugar. Leave in the fridge overnight or through the day. Let the beef come back to room temperature before cooking.
  2. Heat a large frying pan or wok on medium-high heat. Add about a tablespoon of cooking oil. When hot, add the beef and stir fry quickly to prevent the meat from burning and to cook the pieces evenly. When the beef is about 70 per cent cooked, dish out and set aside.
  3. To make the teriyaki sauce, just add the honey to the reserved marinade of soy, mirin and sake back into the wok. Boil over medium-low heat until the sauce is glossy and thickens slightly. It should take on a caramelized taste but be careful not to let it burn.
  4. Add the beef back to the wok and stir well to coat with the thickened sauce. Let the sauce caramelize a bit more with the beef then remove from the wok onto a serving plate.


08 March 2010

Fresh Tomato Salsa

Beef burgers has kinda become a fortnightly weekend event in our household. We still try to come up with different accompaniments to have with our burgers. We did the blue cheese sauce before. This time I was thinking of something fresh but still with a bit of bite. So instead of just adding a few slices of tomato and onion to the burger as the salad section, we ended up making some fresh tomato salsa to go as a topping to our beef burgers. The salsa really does take the burgers to a totally different dimension.

Fresh Tomato Salsa
  • 4 ripe tomatoes (diced)
  • 1 jalapeño chilli (leave the white ribs and seeds if you want it hotter, otherwise remove them, finely sliced) - Omit if you are not a chilli fan.
  • ½ cup Onion (diced)
  • One garlic clove (finely minced)
  • ¼ cup spring onion (finely sliced)
  • ¼ cup fresh coriander leaves and stems (stems finely sliced, leaves roughly chopped)
  • ½ teaspoon sea salt
  • fresh ground pepper
  • Juice of 1 lime
Method:
  1. Place the diced tomatoes tossed with a pinch of salt into a colander over the sink (or bowl) and let drain for 20~30 minutes.
  2. Discard the juice and transfer tomato to the bowl. Add the rest of the ingredients and stir to combine. For more heat, include both the ribs and seed of the chillies.
  3. Taste and adjust the flavour with lime juice, salt and pepper. If the salsa becomes a bit too acidic, add a little sprinkle of sugar to balance things out.
  4. The fresh salsa should be covered, and placed in refrigerator to rest for 30 minutes. Doing this will allow the ingredients to bind together, creating a more intense and well-incorporated flavour.

Beef burger with a dollop of salsa on a not-so-lightly-buttered-bun.. :)

07 March 2010

Ponzu Sauce

This is the recipe for the Ponzu dipping sauce I used with the Beef Tataki. Ponzu is actually a good accompaniment to other meat or fish dishes and can also be used in salads as a vinaigrette.

Ponzu is a citrus flavored soy sauce that is simple yet adds another dimension to the item you have it with. It should be perfectly balanced in terms of saltiness and tanginess without overpowering the dish it is paired with. Ponzu can be used as an alternative for soy sauce when eating sashimi.

For best results, try to use fresh lemon and limes for the citrus juice. Grapefruits can be used as well.

Ponzu Sauce
  • 2 tablespoons fresh lime and lemon juice (about 1 tablespoon each)
  • 2 tablespoons light soy sauce
  • 1 tablespoon mirin
  • 1 tablespoon unseasoned rice wine vinegar
  • 1 tablespoon bonito granules (dissolved in 2 tablespoons of hot water)
Method:
  1. In a bowl, combine all the ingredients together and cover and let sit in the fridge overnight. Let the ponzu come back to about room temperature before using.


06 March 2010

Beef Tataki with Ponzu Sauce

Every fortnight, a few of my foodie colleagues and myself get together for dinner and try out a restaurant. We actually put a list together on google wave of about 18 different places that finishes with Tetsuya. It's with this group that we also try to do a monthly cookingfest at one of our places. The last time I went, I made the pork belly confit (yes.. that means I had the pork belly confit twice). The theme this time is small dishes that goes with sake. I thought I'll stick with a lighter dish this time round, so went with the beef tataki with ponzu sauce and some tsukune chicken meatballs.

The term tataki refers to meat (usually beef or fish) that has been marinated, seared, then chilled and thinly sliced to serve. This is something we always end up ordering at a Japanese restaurant. So was nice to learn how to make it at home.


Beef Tataki with Ponzu Sauce
  • 300g high quality beef fillet (trimmed of fat)
  • 1/2 cup Japanese light soy sauce
  • 1/4 cup mirin
  • 1 tablespoon unseasoned rice vinegar
Garnish
  • 1 stalk Spring onion (green & white part, finally sliced)
  • 1 teaspoon fresh Ginger (peeled, grated through a microplane grater to remove the fibrous parts)
  • 1 teaspoon fresh Daikon Radish (peeled, finely grated through a microplane grater).
Additional items required:
  • Ice cubes
  • Clingwrap
Method:
  1. In a Pyrex or ceramic bowl, mix soy sauce, mirin and rice vinegar. Place beef fillet in bowl and turn several times to coat all sides of beef in marinade. Cover with plastic wrap and place in refrigerator for 20 minutes, flipping the beef over after 10 minutes.
  2. Remove beef from marinade and pat dry with a clean kitchen towel. Discard marinade.
  3. Prepare a bowl large enough to completely submerge your beef with an ice bath. Fill it 1/2 way with some ice and set aside.
  4. Heat a heavy-duty saucepan over high heat. Add just enough cooking oil, about 1 tablespoon, to keep beef from sticking to the pan.
  5. Place beef in pan and quickly sear each side until lightly browned, about 15-20 seconds.
  6. When all sides have been seared, remove from pan and wrap with some clingwrap before plunging the beef into the ice bath to stop the cooking process. Wrapping the beef in the clingwrap before tossing it into the ice bath means that the meat wont come into contact with the water and therefore wont dilute the taste.
  7. To serve, cut across the grain into the thinnest possible slices possible with a very sharp knife. Lightly tap each piece a few times with the blade of the knife to score, being careful not to cut all the way through.
  8. Fan the slices, overlapping, on a platter and let stand for 10 minutes. Drizzle with the Ponzu sauce and serve. Garish with some finely sliced spring onions and some grated ginger and daikon radish on the side.

my tower of beef tataki.. :)
Notes:
  • If you're not confident about getting really thin slices with the beef, about 45 minutes before you plan to serve, place the clingwrapped beef in the freezer (this will firm the beef and make it easier to cut even slices).


Related Posts with Thumbnails